polaroid now instructions
The Polaroid Now brings iconic instant photography into the modern age, offering a simple, creative experience. It’s a camera designed for capturing and sharing moments immediately, blending classic appeal with contemporary functionality.
What is the Polaroid Now?
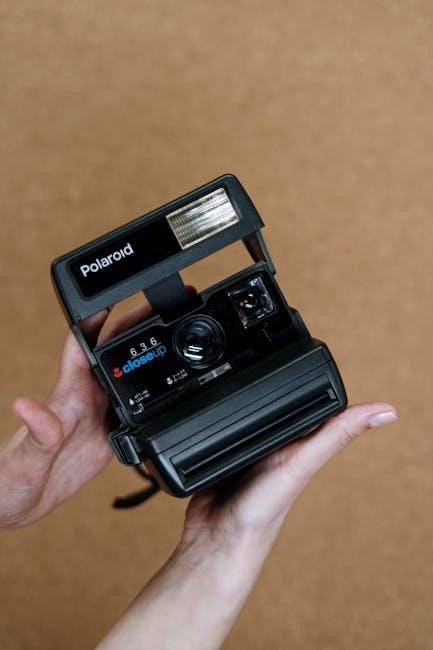
The Polaroid Now is a fully-automatic analog instant camera, representing a revival of the beloved Polaroid experience for a new generation. Unlike digital cameras, it produces physical prints immediately after taking a photo – no apps or transferring needed! This camera utilizes i-Type film, a streamlined film format designed specifically for modern Polaroid cameras, though it’s also compatible with 600 film.
It’s characterized by its simple operation, making it accessible for beginners while still appealing to photography enthusiasts. The camera boasts a powerful autofocus lens, ensuring sharp and clear images with minimal effort. The Polaroid Now isn’t just a camera; it’s a statement, a tangible connection to the moment, and a unique way to share memories.
Key Features of the Polaroid Now
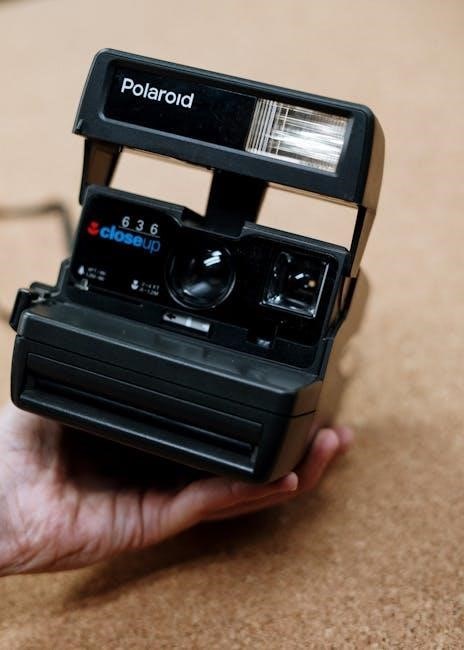
The Polaroid Now boasts several standout features. Its autofocus lens delivers consistently sharp photos, eliminating guesswork and ensuring clear results. The camera features a powerful, built-in flash, automatically adjusting to the lighting conditions for optimal exposure; It’s powered by a rechargeable battery, a significant upgrade from older Polaroid models requiring disposable batteries.
The camera’s design is both retro and modern, offering a comfortable grip and intuitive controls. It’s compatible with Polaroid i-Type and 600 film, providing flexibility in film choices. The simple, point-and-shoot operation makes it incredibly user-friendly, while the instant gratification of physical prints adds a unique charm.

Getting Started with Your Polaroid Now
Begin your instant photography journey by unpacking your Polaroid Now and preparing it for use. This involves a few simple steps to ensure optimal performance and enjoyment.
Unboxing and Initial Setup
Carefully unpack your Polaroid Now, ensuring all components are present. You should find the camera itself, a USB charging cable, and a quick start guide. Before first use, remove any protective films or packaging materials from the camera body and the film door. Take a moment to familiarize yourself with the camera’s layout – locate the power button, shutter button, flash settings, and film door release.
Inspect the camera for any visible damage. The initial setup is remarkably straightforward; the Polaroid Now is designed for immediate use; Ensure the battery is adequately charged (or insert batteries – see the next section) and that you have a compatible film pack ready for loading. A fully functional camera awaits, ready to capture and develop memories instantly!
Inserting Batteries
The Polaroid Now utilizes four AA batteries to power its instant photography capabilities. Locate the battery compartment on the bottom of the camera. Gently slide the battery compartment cover open, typically with a latch or sliding mechanism. Insert four AA batteries, paying close attention to the polarity markings (+ and -) inside the compartment. Incorrect battery insertion will prevent the camera from functioning.
Ensure the batteries are securely seated and the compartment cover is fully closed. A properly secured cover is crucial for maintaining power and preventing accidental battery dislodgement. The camera may indicate low battery power with a warning light or through diminished performance. Use high-quality alkaline batteries for optimal results and longevity.

Loading Film
Loading film into the Polaroid Now is a straightforward process, essential for capturing those instant memories. Begin by locating the film door, usually on the rear of the camera. Gently open the film door, revealing the film compartment. Insert the Polaroid film cartridge, ensuring it clicks securely into place. The film pack should slide in smoothly; do not force it.
Once the film cartridge is inserted, close the film door firmly. Upon closing, the camera will automatically eject the dark slide, a protective shield for the unexposed film. Remove and discard this dark slide – it’s not a photo! The camera is now ready to shoot. Always load film in subdued lighting to prevent unwanted exposure.
Opening the Film Door
To begin loading film, you must first access the film compartment by opening the film door on your Polaroid Now camera. This door is typically located on the back of the camera body. Locate the release latch or button designed to open the compartment – it’s usually clearly marked or intuitively positioned.
Gently depress or slide the latch to release the door. The film door should swing open smoothly, revealing the interior where the Polaroid film cartridge will be inserted. Avoid using excessive force, as this could damage the camera’s mechanism. Once open, you’re ready to proceed with inserting the new film pack, preparing for instant photography!
Inserting the Film Cartridge
With the film door open, carefully take your new Polaroid film cartridge; Align the cartridge with the film compartment, ensuring the film pack’s connector aligns with the corresponding slot inside the camera. Gently slide the film cartridge into the compartment until it’s firmly seated and clicks into place.
Ensure the cartridge is fully inserted to guarantee proper film feeding and ejection. Avoid forcing the cartridge; if it doesn’t slide in easily, double-check the alignment. Once securely in place, the camera is ready for the final steps of closing the film door and ejecting the protective film shield.
Closing the Film Door & Ejecting the Film Shield
After inserting the film cartridge, gently close the film door until it latches securely. Do not force it; a proper closure is essential for the camera to function correctly. Once the door is closed, the camera will automatically eject a dark film shield.
This dark shield protects the initial photos from light exposure during the loading process. Carefully remove and discard this shield – do not attempt to use it for taking pictures! Ejecting the shield confirms the film is loaded and the camera is prepared for capturing your first instant memories. Now you’re ready to start shooting!

Understanding the Camera Controls
The Polaroid Now features intuitive controls, including a power button, shutter release, and flash settings, designed for straightforward operation and creative control over your instant photos.
Power Button and Operation
The power button on your Polaroid Now is located on the back of the camera, easily accessible for quick activation. A single press of this button turns the camera on, initiating the system check and preparing it for capturing memories. The camera will automatically enter standby mode after a period of inactivity to conserve battery life.
To reactivate, simply press the power button again. A green indicator light confirms the camera is operational and ready to shoot. Remember to always power down the camera when not in use to maximize battery performance and ensure longevity. The simple on/off functionality makes the Polaroid Now incredibly user-friendly, allowing you to focus on the moment, not complex settings.
Shutter Button Functionality
The shutter button on the Polaroid Now is the primary control for capturing your instant photos. A firm, full press of the shutter button initiates the exposure and film ejection process. You’ll hear a distinct clicking sound, confirming the photo is being taken and developed.
Avoid any sudden movements during and immediately after pressing the shutter, as this could potentially cause blurriness. The camera automatically calculates the optimal exposure settings, simplifying the process for the user. Holding the shutter button down continuously will not take multiple shots; each press captures a single image. The simplicity of the shutter button allows for spontaneous and effortless photo-taking.
Flash Settings
The Polaroid Now features a built-in flash designed to optimize image brightness in various lighting conditions. By default, the camera operates in Automatic Flash Mode, intelligently determining when flash is needed. This ensures well-lit photos even in dimly lit environments.
However, you also have the option of Disabling the Flash for situations where it’s undesirable, such as brightly lit outdoor scenes, to avoid washed-out images or harsh reflections. The flash automatically recharges between shots, indicated by a small light near the flash itself. Understanding these settings allows for greater control over your photos’ aesthetic and quality.
Automatic Flash Mode
In Automatic Flash Mode, the Polaroid Now intelligently assesses the ambient light and automatically activates the flash when needed. This is the default setting and is ideal for most shooting situations, particularly indoors or in low-light conditions. The camera’s sensor determines if additional illumination is required to achieve a properly exposed photograph.
When the flash fires, you’ll notice a brief burst of light. The flash automatically recharges itself between shots, so there’s no manual delay to worry about. This mode simplifies the photography process, allowing you to focus on composition and capturing the moment without needing to adjust flash settings manually. It’s a convenient and reliable option for everyday use.
Disabling the Flash
To disable the flash on your Polaroid Now, press and hold the flash button located on the back of the camera for approximately two seconds. A flash icon will appear on the viewfinder, crossed out, indicating that the flash is now turned off. This is useful when shooting in brightly lit environments where the flash would wash out the image or create unwanted reflections.
Remember that disabling the flash requires sufficient ambient light for a properly exposed photograph. If the scene is too dark, your photos may appear underexposed. To re-enable the flash, simply press and hold the flash button again for two seconds until the flash icon reappears without the cross-out symbol.
Focusing the Polaroid Now
The Polaroid Now utilizes a focusing system designed for simplicity and ease of use. Unlike cameras with complex focusing rings, the Now features a two-step focusing process. First, compose your shot through the viewfinder, ensuring your subject is within the frame. Then, simply press the shutter button halfway down.
The camera will automatically calculate the optimal focus distance. A green indicator light will illuminate in the viewfinder, confirming that focus has been locked. If the light doesn’t illuminate, try slightly adjusting your distance from the subject and pressing the shutter button halfway again. The Now is optimized for subjects between 2 feet (0.6 meters) and infinity.

Taking Your First Photos
With your Polaroid Now ready, composing and capturing memories is straightforward! Point, frame your desired shot, and press the shutter button for instant gratification.
Framing Your Shot
Carefully consider your composition before pressing the shutter button. The Polaroid Now doesn’t offer a digital preview, so what you see is what you get! Think about the elements within the frame and how they interact.
Utilize the viewfinder to align your subject. Pay attention to the background – is it distracting, or does it complement your main focus? Experiment with different angles and perspectives to create more dynamic and interesting images.
Remember the Polaroid Now’s fixed focus; subjects should generally be between 2 feet and infinity away for optimal sharpness. Get close to your subject for portraits, or step back to capture wider scenes. A little planning goes a long way in achieving the perfect Polaroid!
Pressing the Shutter Button
Once your shot is framed, gently press the large, red shutter button located on the front of the Polaroid Now. Press it down smoothly and consistently – avoid jerking motions, as this could cause slight blur. You’ll hear a distinct clicking sound as the shutter activates, signaling that the photo is being taken;
After pressing the shutter, hold the camera steady for a few seconds while the film begins to eject. Avoid moving or shaking the camera during this initial phase, as it can affect the development process.
The film will gradually emerge from the camera slot. Resist the urge to pull it out prematurely; allow it to fully extend and develop naturally for the best results!
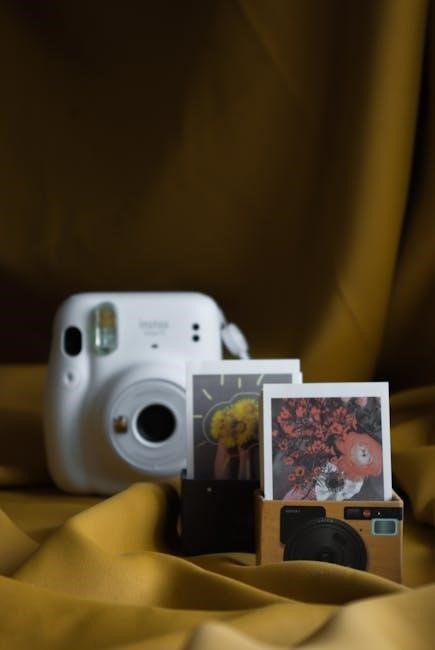
Film Ejection and Development
Following the shutter press, the Polaroid Now will automatically eject the newly exposed film print. Watch as the blank image slowly emerges from the camera slot – this is where the magic happens! It’s crucial not to pull or assist the film’s ejection; let it extend fully on its own.
The development process takes several minutes, typically around 10-15 minutes, though it can vary depending on the ambient temperature. During this time, the image will gradually become clearer and more vibrant.
To protect the developing image from light, place the print face down on a flat surface or shield it with your hand. Avoid bending or folding the film during development, as this can damage the image.
Troubleshooting Common Issues
Encountering problems? This section addresses frequent concerns like film ejection failures, blurry images, and flash malfunctions, offering quick solutions for a smooth shooting experience.
Film Not Ejecting
If your Polaroid Now isn’t ejecting film, several factors could be at play. First, ensure you’ve fully closed the film door after loading; a slightly ajar door prevents ejection. Check the battery level – low batteries often cause this issue, hindering the motor’s function.
Sometimes, a film pack might be defective. Try a new pack to rule this out. Gently shake the camera downwards after taking a photo; this can dislodge a stuck film. Avoid forcing the film, as this could damage the camera.
If the issue persists, power cycle the camera (turn it off and on). Refer to the official Polaroid support resources for further assistance and potential troubleshooting steps specific to your camera model.
Blurry Photos
Experiencing blurry photos with your Polaroid Now? The primary cause is often insufficient light. Polaroid film requires ample light for proper exposure and focus. Ensure you’re shooting in well-lit environments, or utilize the built-in flash. Remember the minimum focusing distance – getting too close to your subject will result in blurriness.
Also, camera shake can contribute to blur. Hold the camera steady while pressing the shutter button. Avoid movement during the film development process, as vibrations can affect image clarity. Check the lens for smudges or fingerprints and clean it gently with a microfiber cloth.
Finally, ensure the film pack is correctly loaded and not expired, as old film can produce unpredictable results.
Flash Not Working
If your Polaroid Now’s flash isn’t firing, first confirm it isn’t intentionally disabled. The flash has an automatic mode, but you can override it. Check the flash setting – ensure it’s not set to ‘off’. Low battery levels can also prevent the flash from functioning correctly; replace or recharge the batteries.
Inspect the flashbulb itself for any visible damage. Though rare, a faulty flashbulb will need replacement. Sometimes, a simple reset can resolve the issue; remove and reinsert the batteries. Ensure the camera isn’t in a mode that suppresses the flash, like a long-exposure setting (if applicable).
If problems persist, consult the official Polaroid support resources.
Maintaining Your Polaroid Now
Regular cleaning with a soft cloth and proper film storage are crucial for optimal performance and longevity of your Polaroid Now camera.
Cleaning the Camera Body
Keeping your Polaroid Now clean ensures its aesthetic appeal and functional reliability. Regularly wipe down the camera body with a soft, dry cloth to remove dust, fingerprints, and smudges. Avoid using abrasive cleaners, solvents, or excessive moisture, as these can damage the plastic and electronic components.
For stubborn marks, lightly dampen the cloth with water, ensuring it’s not dripping wet. Gently wipe the affected area, then immediately dry it with a clean, dry portion of the cloth. Pay particular attention to the lens, using a lens cleaning cloth or a very soft microfiber cloth to avoid scratches. Do not spray any liquids directly onto the camera; always apply them to the cloth first. Proper cleaning will help maintain the camera’s appearance and prevent potential issues.
Film Storage Guidelines
Proper film storage is crucial for maintaining the quality and longevity of your Polaroid Now photos. Unopened film packs should be stored in a cool, dry place, away from direct sunlight and extreme temperatures. Ideally, keep them refrigerated, but avoid freezing. This slows down the chemical processes within the film.
Once a film pack is opened, it’s more sensitive to environmental factors. Use it within the recommended timeframe, and shield it from light and heat as much as possible. Avoid storing partially used film packs in hot cars or direct sunlight. Consistent, cool storage ensures optimal image development and vibrant colors, maximizing the enjoyment of your instant photographs.